My Story
I bought this Grove MZ66B not running. It ran when it was parked.
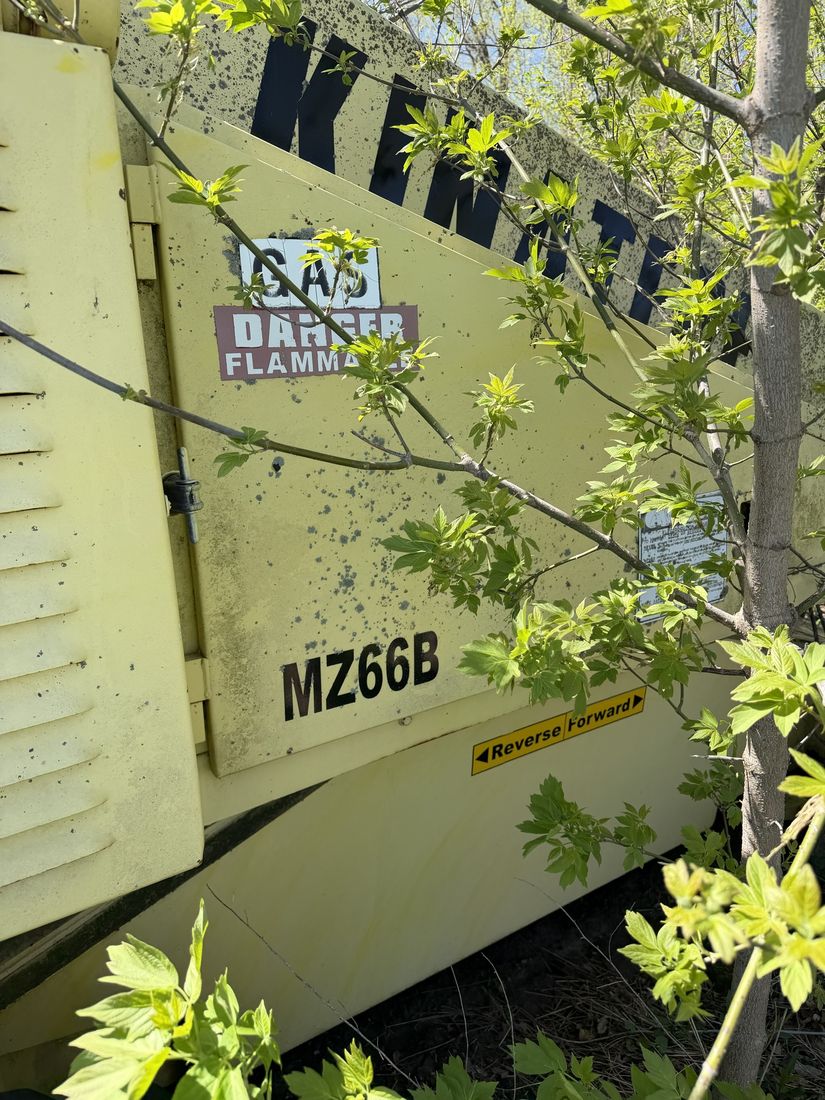
First look
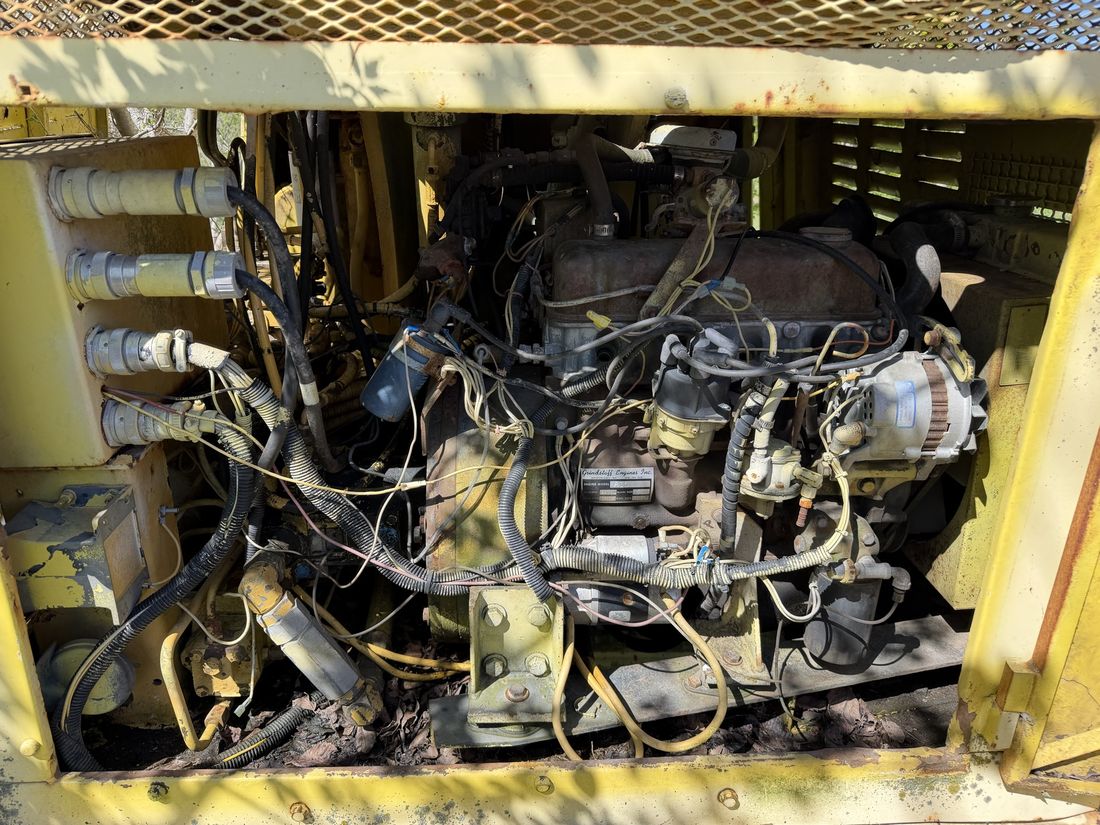
Before touching anything, I walked the machine and wrote down exactly what I found.
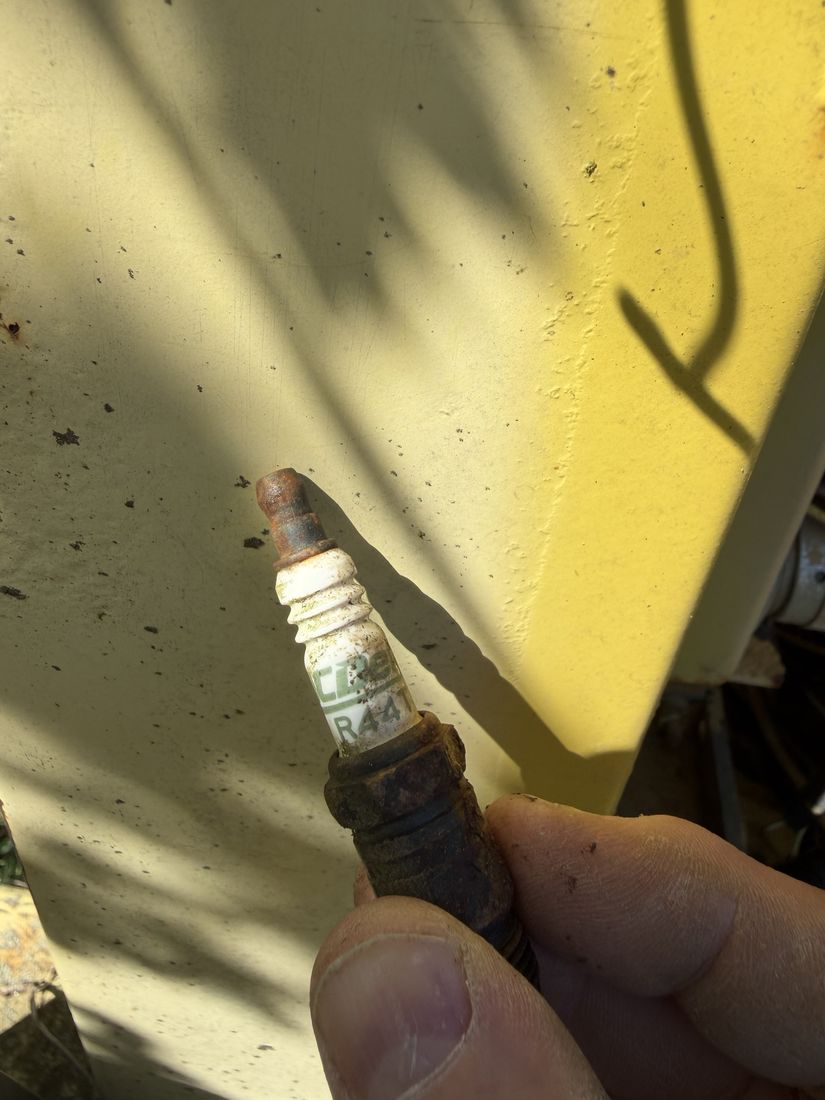
- Spark plugs are AC Delco R44T.
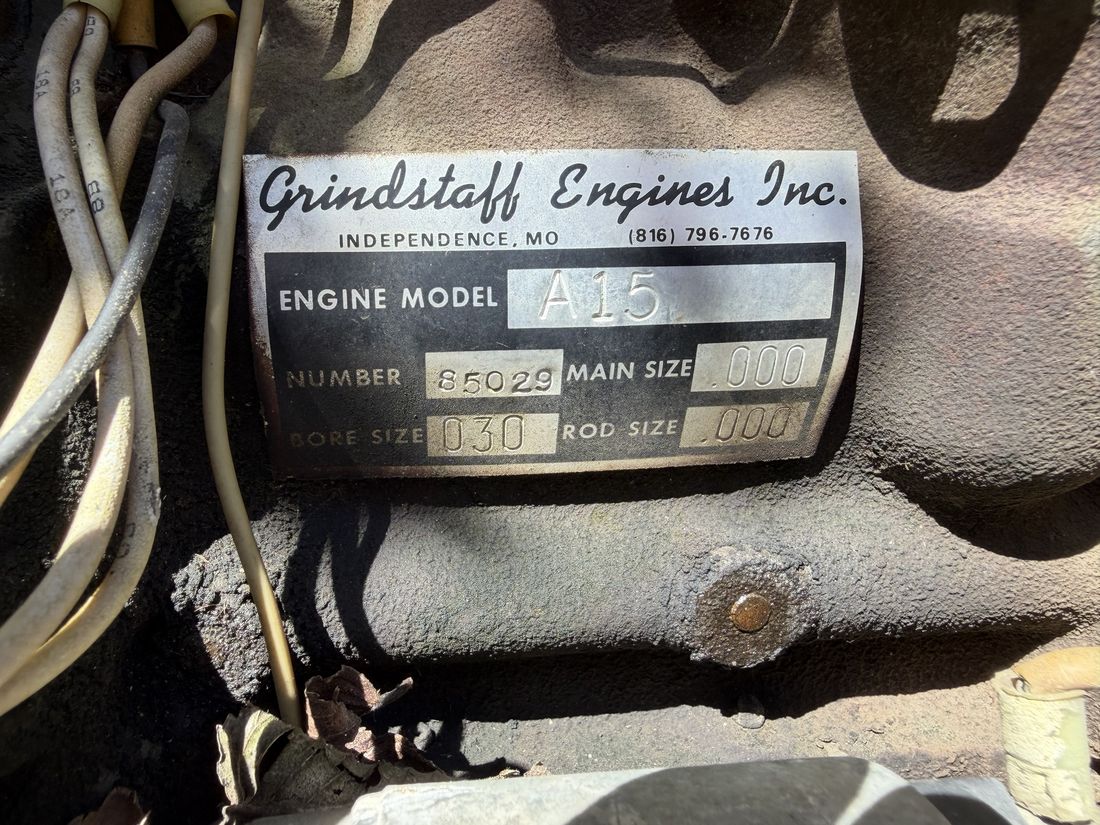
- The engine is a Grindstaff-supplied Nissan A15, engine number 85029, bored .030 over standard, with standard main and rod bearings.
- Mousy wiring damage on what looks like limit switch wiring near the engine bay linkage.
- The actuator that should run from the solenoid housing to the throttle body isn’t there anymore — the housing is empty.
- The pistons need PB Blaster and some worked air before I try to crank it over.
- Spark plug holes are open (plugs out).
- There’s some kind of coil on the left side of the engine bay, on the hydraulic line, that’s disconnected — you can see the windings. The hydraulic line itself is still connected.
- Near that disconnected coil there’s a hose, and I think it’s damaged.
- Oil smells right, level is good, and it looks clean in the valve cover.
- Coolant smells right and looks right — I thought I saw something like stop-leak residue in the cap, but on a closer look it was probably just grit.
- The control bucket (platform controls) has some damage.
Trips out to the machine
- 22 Aug 2026 - Second Look. Cap off, camera out. Cylinder 2 was full of water and the engine wouldn’t turn; the distributor turned out to be electronic, no points; and the mystery coil turned out to be the propane regulator, not hydraulics. Photos and the full write-up.
- 23 Aug 2026 - Draining It Out. Drained the fluids and found the crankcase full of water, a gallon or more. Still zero movement on the crank. Measured the battery box, drained the fuel tank, and got the filter and plug part numbers recorded.
- 07 Sep 2026 - It Turns. Pulled the starter, gave the bores a fresh dose of Kroil, and levered the flywheel ring gear through the starter opening. The crank turns a full revolution by hand for the first time this project. Also picked up the starter’s own part number.
- 09 Sep 2026 - Compression, No Spark. Cranked it on the starter to clear the bores and got compression on all four cylinders, though the readings are spread wide. No spark, and the ignition coil ohms out open on the secondary. Also read the distributor’s own casting numbers off the body for the first time, and worked out what the “switch in basket must be up” writing on the panel refers to.
- 13 Sep 2026 - Firing Order Diagram. The plug wire map drawn up as a single picture, plus how the engine sits in the machine. Mounted transversely, front of the engine facing right, distributor to the rear of the vehicle and the coil to the left.
What I found out
The missing throttle actuator
The empty housing is for the Grove throttle/choke solenoid, P/N 7750000085. It fits Grove telescoping boom lifts including the MZ66B with the Nissan A-15.
- Part page: https://www.buymachineryparts.com/products/throttle-and-choke-solenoid-7750000085-for-grove-mzi45-mz48b-mz48bxt-mz66b-amz40-amz40b-amz40xt
- 6½" long, 1½" dia., 2-hole mount — matches the empty housing. 3 terminals: POS/NEG/AUX.
- Per a forum thread, it’s a 12V pull-type solenoid that doesn’t do anything until “rabbit mode” (high-speed/loaded function) kicks in — then it pulls the governor linkage to raise RPM to about 1500 under hydraulic load. It’s not needed to idle the engine.
Still need to source the part and check the POS/NEG/AUX wiring against the schematic I already have before powering it — the pinout isn’t confirmed beyond the terminal labels.
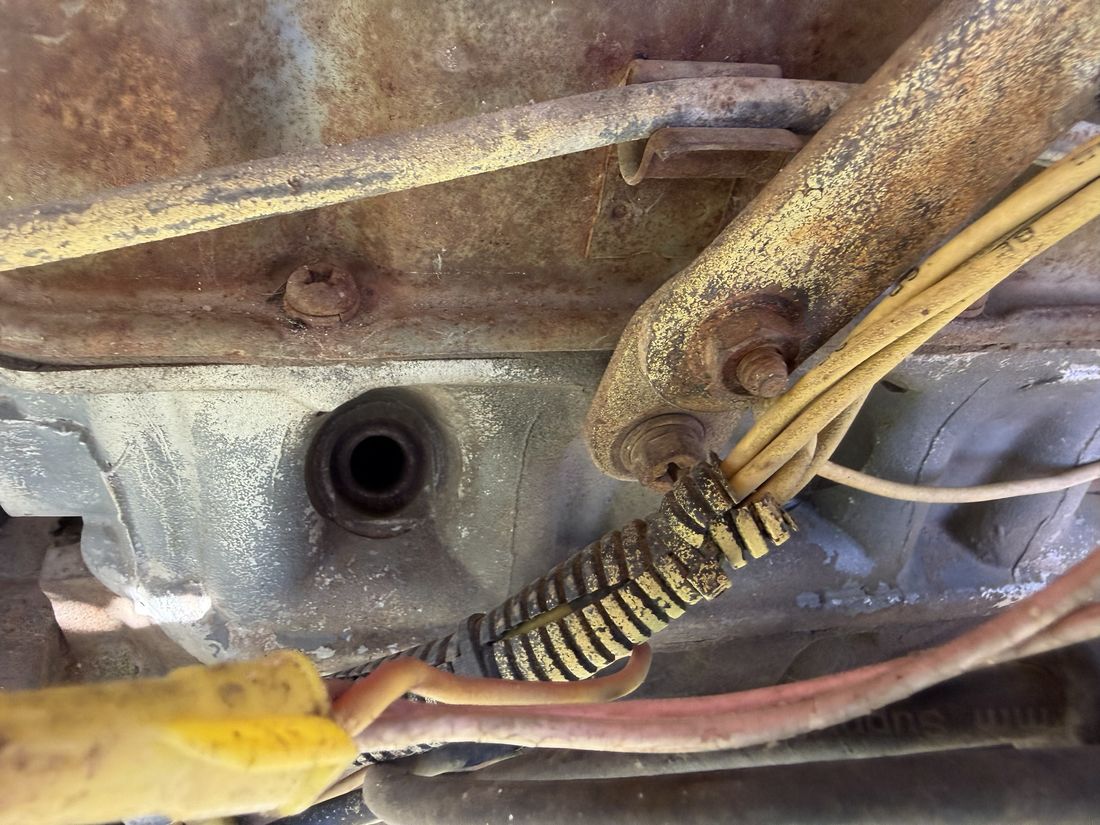
The disconnected coil on the hydraulic valve body
It’s a hydraulic coil, likely a solenoid, on the hydraulic valve body in the engine bay — not fuel-related. Most likely candidate: one of the coils on Grove’s hydraulic manifold, P/N 7926003166. The parts catalog (pp. 249–261) calls this the “electrically activated consolidated valve bank” — it sits right at the hydraulic filter cluster, which is where I found the coil. Multiple coils live on that manifold:
- COIL, 12 VOLT — 9926103487
- COIL — 9926107771
- SOLENOID ASSY (2 per) — 9926106294
- CARTRIDGE AND COIL ASSEMBLY — 9926110847
- VALVE ASSY, SOLENOID — 9926106751
The hydraulic sheet (p.10) of the schematic I already have shows the whole valve bank and confirms it’s the same manifold as P/N 7926003166.
Before I reconnect anything, I’m taking that schematic (p.10) and the parts catalog pages (249–261) out to the machine and matching the coil by wire color and routing.
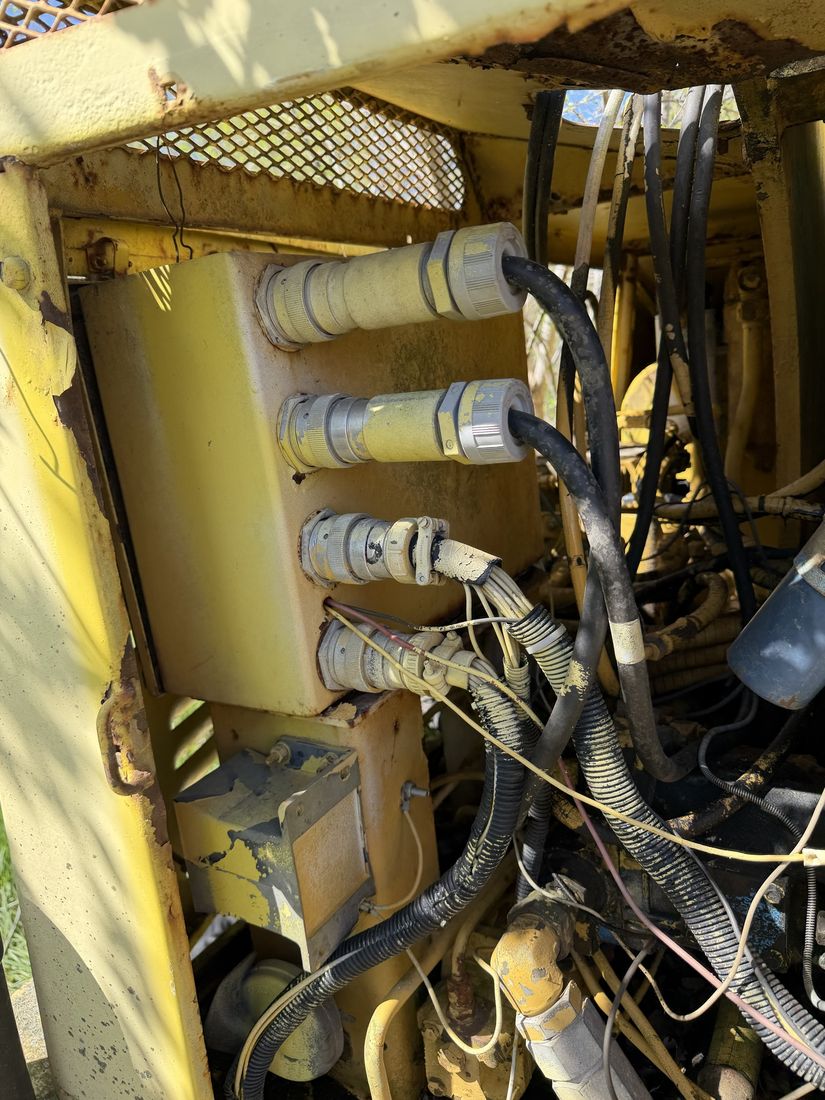
The wiring damage — the boom lowered limit switch
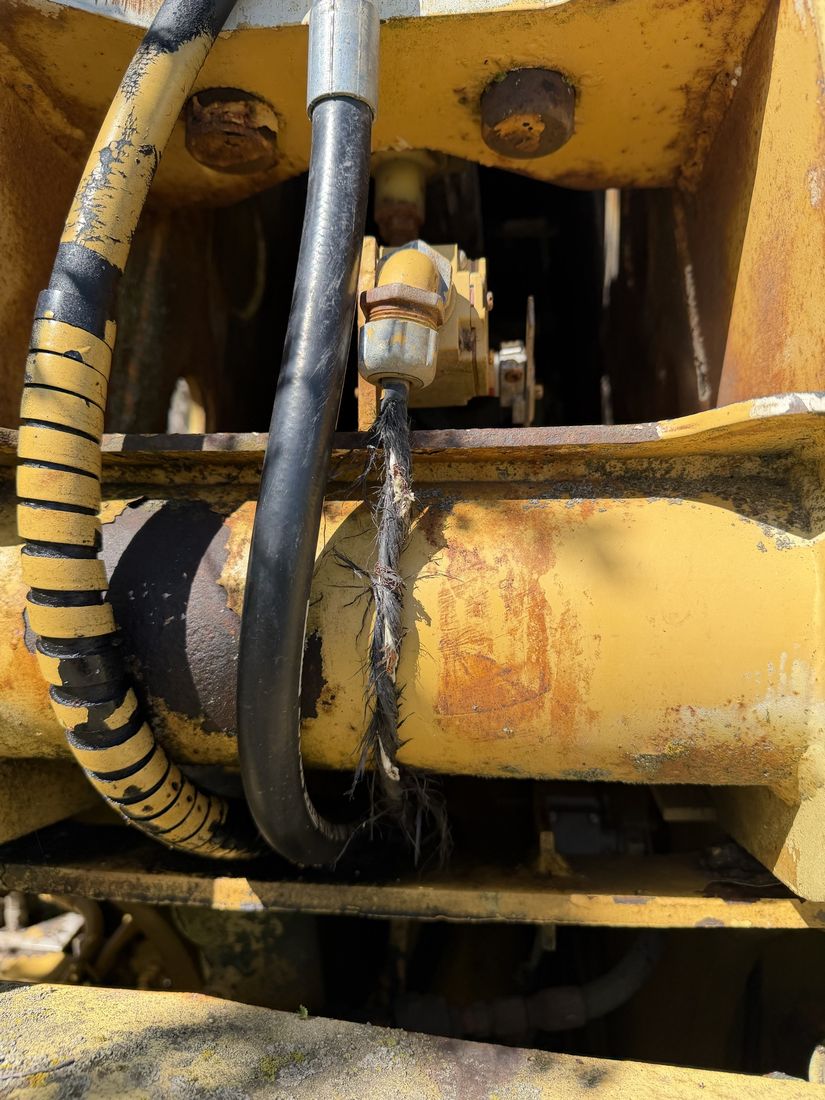
Mice got into the wiring near the engine bay linkage. It’s for the boom lowered limit switch, at the boom’s lower pivot on the turntable — P/N 7872001401 (SWITCH AND ARM, LIMIT), on harness P/N 6512001903. The operator’s handbook says it’s mounted on the rear of the turntable, underneath the boom base section, and the parts catalog’s own diagram for that harness is captioned “PART OF TURNTABLE” — same spot. Once I’m at the machine I’ll trace it to the connector and replace that harness section instead of splicing it.
Safety Notes — i.e. Keeping People from Getting Squashed
Limit switches and interlocks on an aerial platform aren’t optional. OSHA and ANSI (29 CFR 1910.67, ANSI A92.5) require working platform/lower controls and an auxiliary lowering system. I’m fixing these circuits properly — not jumpering the limit switch, not leaving the hydraulic solenoid disconnected just to get the machine moving. If that solenoid turns out to be part of the emergency-lowering circuit, that’s even more reason not to cut corners.
What’s next
- Spray the plug holes with PB Blaster, try to ease the engine over — or let it sit and soak if it doesn’t budge.
- Pull the battery and test it.
- Next time out: check for seizing again if the PB Blaster didn’t fix it.
- New plugs.
- Check for spark, assuming it’ll roll over.
- Probably a new battery.
- If I’ve got spark and it still won’t run, try ether.
- Fresh gas, bypassing the tank.
- If that doesn’t work, check for fuel getting to the carb.
- If there’s fuel at the carb, clean the carb.
- Once it runs: make sure the limit switches work well enough — may have to check this while starting it, since they can kill operations.
- Get it home.
- A real once-over: lube, filters, fluid changes depending on how the fluids look.